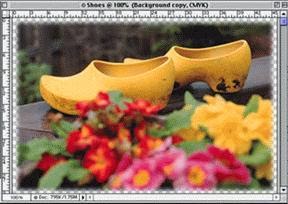
Ever wanted to add color to your old, vintage, or historical
photographs? Load up some old pictures and see how color can be added
quickly to any black and white photograph in this simple Photoshop how
to.
While many purists simply don’t like the look of colorized black and
white photographs, the ability to add color to black and white images is
as indispensible as it is simple. Read on to see just how easy it can
be.
Starting with Grayscale Images
Simply because an image is in black and white doesn’t mean that it is a
Grayscale image. Once your photograph is open, our first task is
checking our Color Mode.
Navigate to Image > Mode > RGB color to set your image to RGB.
If it is in Grayscale or some other color mode, Photoshop will convert
it for you. Once this is done, you’ll be ready to add color to your
image.
Using Blending Modes to Add Color


One of the simplest ways to add color to a black and white image is
using Blending Modes. But rather than create a dozen layers with
individual blending modes, we will create a single layer group with a
group blending mode. Here’s how to do it:
- Press
 to create a New Layer.
- With that New Layer selected, press


 to group your new layer.
- Select your new layer group as shown above, and set your Blending Mode to “Color.”


You’ll find Blending Modes in the pulldown tab directly under the top
of the “Layers” panel. Click to pull it down to set the blending mode
of your Group to “Color” as shown above.

Once your group is set to blending mode “Color” reselect your layer and let’s check out some ways to add color to our image.
Some Ways to Add Colors to Your Image without Painting

You can now add color into any layer you make inside your new group.
The question is, how? Any way you can add color to layers is a way that
will work. Let’s start with a simple and quicker, but rougher method
using the Lasso Tool or even the Pen Tool,
if you feel like you’ve mastered it.

The Lasso and the Pen Tool both do roughly the same thing in this
situation. You’ll be drawing and outlining shapes, and then filling them
with the Bucket Fill or by going to Edit > Fill and using your
foreground color. While this method does not give the most refined of
results, it can be the fastest. If you wish to take a more hands-on,
controlled approach, you’ll want to keep reading to see the “painting”
method using the Photoshop Brush tool.
Using the Brush Tool to Paint Color into Photographs

If you’re not there, return to the group you set to Blending Mode
“Color.” Navigate to the blank layer you made there and select the Brush
Tool in your toolbar.

Press

to select the Brush Tool, then right-click in your image to bring up
the Brush Tool contextual menu. Select “Soft Round” as shown.


Click the Foreground Color area of your toolbar (as shown above left)
to bring up the Color Picker. Stick with colors much duller than you
want your image to look like, as they’ll brighten up considerably when
they’re painted on.

Simply mouse over the areas of your image you want to be that color.
Be as precise as possible, but feel free to use the eraser tool as
needed.

You may find that your color, even though it is dull, appear garish. You can adjust this many different ways.


Reducing the opacity, as shown above, of your layers, can reduce the intensity of your colors and make them more naturalistic.


to add new layers whenever you want to add new colors. Keeping layers
separate will give you greater control. And since they are contained
within the same group, you’ll find they all conform to the same “Color”
blending mode.

Zoom in to add details as needed. Minor details, such as the right
color of blue in the eyes, can really bring a colorized image to life.
Improve Garish Colors with the Hue/Saturation Tool

It can be all to easy to start working with a color that seems like
it’ll be the right shade, only to turn out too bright, garrish or ugly.
Here’s how to adjust it and continue painting.

Paint or find a sample of the color you want to change to better suit your image.

Press

to bring up the Hue/Saturation tool.

Adjust Hue, Saturation, and Lightness values until your color suits
your image. As you can see above, the garish red has transformed to a
more appropriate reddish brown.

Alt + Click on the

in your layers panel, beside your active layer inorder to hide all the other layers. Then press the

to select the Eyedropper tool. Click your painted swatch once to select the changed color as your foreground color.

Alt + Click the same

again to turn all the layers back on. Shortcut key

will give you back the Brush Tool and allow you to return to painting
like normal. Add as many or as few colors as you feel your image needs,
in all the details you care to put in.

And with minimal work and time invested, a black and white image is
now full of rich color. Practice with the brush tool, as it is likely
the best method for achieving excellent results in colorizing black and
white photographs.
--